
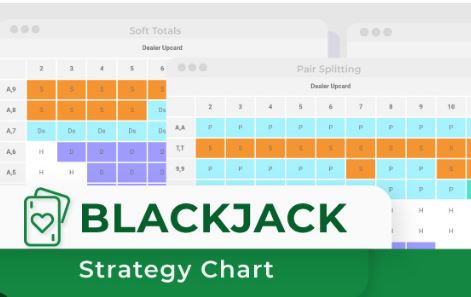
Blackjack basic strategy is the mathematically correct default play for each hand against the dealer's visible card. It does not win every hand, but under favorable rules it can reduce the house edge to around 0.5%, which is why learning the chart is one of the most useful things a blackjack player can do.
If you need the rules before the chart, read how to play blackjack. For a more narrative explanation of the decisions behind the grid, continue with our classic blackjack strategies.
How to read this blackjack strategy chart
Every starting hand belongs to one of three categories: hard totals, soft totals or pairs. Find your hand down the left side, then follow the row to the dealer's up card across the top. The cell where they meet is the recommended play.
Hard totals
A hard hand has no Ace, or an Ace that can only count as 1 without busting.
| Your hand | 2 | 3 | 4 | 5 | 6 | 7 | 8 | 9 | 10 | A |
|---|---|---|---|---|---|---|---|---|---|---|
| 8 or less | HHit | HHit | HHit | HHit | HHit | HHit | HHit | HHit | HHit | HHit |
| 9 | HHit | DDouble if allowed | DDouble if allowed | DDouble if allowed | DDouble if allowed | HHit | HHit | HHit | HHit | HHit |
| 10 | DDouble if allowed | DDouble if allowed | DDouble if allowed | DDouble if allowed | DDouble if allowed | DDouble if allowed | DDouble if allowed | DDouble if allowed | HHit | HHit |
| 11 | DDouble if allowed | DDouble if allowed | DDouble if allowed | DDouble if allowed | DDouble if allowed | DDouble if allowed | DDouble if allowed | DDouble if allowed | DDouble if allowed | HHit |
| 12 | HHit | HHit | SStand | SStand | SStand | HHit | HHit | HHit | HHit | HHit |
| 13 | SStand | SStand | SStand | SStand | SStand | HHit | HHit | HHit | HHit | HHit |
| 14 | SStand | SStand | SStand | SStand | SStand | HHit | HHit | HHit | HHit | HHit |
| 15 | SStand | SStand | SStand | SStand | SStand | HHit | HHit | HHit | RsSurrender if allowed | HHit |
| 16 | SStand | SStand | SStand | SStand | SStand | HHit | HHit | RsSurrender if allowed | RsSurrender if allowed | RsSurrender if allowed |
| 17+ | SStand | SStand | SStand | SStand | SStand | SStand | SStand | SStand | SStand | SStand |
Want more detail? See our guide to hard hands in blackjack.
Soft totals
A soft hand contains an Ace counted as 11, giving you extra flexibility because the next card cannot immediately bust the hand.
| Your hand | 2 | 3 | 4 | 5 | 6 | 7 | 8 | 9 | 10 | A |
|---|---|---|---|---|---|---|---|---|---|---|
| A,2 (13) | HHit | HHit | HHit | DDouble if allowed | DDouble if allowed | HHit | HHit | HHit | HHit | HHit |
| A,3 (14) | HHit | HHit | HHit | DDouble if allowed | DDouble if allowed | HHit | HHit | HHit | HHit | HHit |
| A,4 (15) | HHit | HHit | DDouble if allowed | DDouble if allowed | DDouble if allowed | HHit | HHit | HHit | HHit | HHit |
| A,5 (16) | HHit | HHit | DDouble if allowed | DDouble if allowed | DDouble if allowed | HHit | HHit | HHit | HHit | HHit |
| A,6 (17) | HHit | DDouble if allowed | DDouble if allowed | DDouble if allowed | DDouble if allowed | HHit | HHit | HHit | HHit | HHit |
| A,7 (18) | SStand | DDouble if allowed | DDouble if allowed | DDouble if allowed | DDouble if allowed | SStand | SStand | HHit | HHit | HHit |
| A,8 (19) | SStand | SStand | SStand | SStand | SStand | SStand | SStand | SStand | SStand | SStand |
| A,9 (20) | SStand | SStand | SStand | SStand | SStand | SStand | SStand | SStand | SStand | SStand |
A good example of why soft hands are nuanced - the right play changes from double to stand to hit depending on the dealer.
Under this S17 chart, soft 19 stands across the board. H17 tables can create an adjustment against dealer 6.
Pairs
When the first two cards match in value, splitting becomes another possible decision.
| Your hand | 2 | 3 | 4 | 5 | 6 | 7 | 8 | 9 | 10 | A |
|---|---|---|---|---|---|---|---|---|---|---|
| 2,2 | PSplit | PSplit | PSplit | PSplit | PSplit | PSplit | HHit | HHit | HHit | HHit |
| 3,3 | PSplit | PSplit | PSplit | PSplit | PSplit | PSplit | HHit | HHit | HHit | HHit |
| 4,4 | HHit | HHit | HHit | PSplit | PSplit | HHit | HHit | HHit | HHit | HHit |
| 5,5 | DDouble if allowed | DDouble if allowed | DDouble if allowed | DDouble if allowed | DDouble if allowed | DDouble if allowed | DDouble if allowed | DDouble if allowed | HHit | HHit |
| 6,6 | PSplit | PSplit | PSplit | PSplit | PSplit | HHit | HHit | HHit | HHit | HHit |
| 7,7 | PSplit | PSplit | PSplit | PSplit | PSplit | PSplit | HHit | HHit | HHit | HHit |
| 8,8 | PSplit | PSplit | PSplit | PSplit | PSplit | PSplit | PSplit | PSplit | PSplit | PSplit |
| 9,9 | PSplit | PSplit | PSplit | PSplit | PSplit | SStand | PSplit | PSplit | SStand | SStand |
| 10,10 | SStand | SStand | SStand | SStand | SStand | SStand | SStand | SStand | SStand | SStand |
| A,A | PSplit | PSplit | PSplit | PSplit | PSplit | PSplit | PSplit | PSplit | PSplit | PSplit |
Turning the pair into two new hands gives each Ace a chance to pair with a 10-value card.
Hard 16 is weak. Splitting gives both hands a chance to improve independently.
Treat the pair as a hard 10 and double where the chart calls for it.
Twenty is already an excellent total. Basic strategy keeps the hand intact.
Adjusting the chart for different table rules
Basic strategy shifts when the game rules change. The tables above are the default for the stated multi-deck S17 setup, so check the live or software table before using them.
A few decisions become more aggressive. Common examples include doubling 11 against a dealer Ace, doubling soft 19 (A,8) against dealer 6, and surrendering hard 15 against an Ace when surrender is available.
Every Rs cell in the hard-total chart becomes a straight Hit.
Do not assume the same double opportunities after splitting. Play those resulting hands according to the applicable hard or soft strategy without the unavailable double option.
Some plays can change in lower-deck games. Examples in the supplied chart notes include doubling 8 against dealer 5 or 6 and some rule-dependent pair decisions.
The individual hit, stand, double and split decisions do not change, but the payout is materially worse for the player. When a comparable 3:2 table is available, the 3:2 game is generally the better choice.
Compare blackjack casino and table options →A few things basic strategy does not cover
Basic strategy says not to take insurance as a routine recreational-player decision. Insurance is a separate side bet and requires different math from the main hand.
Read: Insurance in Blackjack →Correct strategy improves the mathematical quality of the decision. Any individual hand or session can still lose.
This chart assumes no count-based information. Advanced players can make selected index adjustments when the deck composition changes, but counting is a separate skill built on top of basic strategy.
Explore broader blackjack strategies →How to practice the chart
Learn it in layers rather than trying to memorize every cell at once. Hard totals appear frequently, so start there. Add soft totals next, then pair decisions. Printing the chart or keeping it open beside a practice game can help turn repeated decisions into habits where casino rules permit strategy aids.
Basic strategy is not a promise that the next hand will win. It is a repeatable system for making the mathematically stronger default decision, hand after hand.